I’ve been doing a lot of river engineering work lately. The approach is based on the use of Geographic Information Systems (GIS) - Civil 3D, a hydrologic model-HEC-HMS and a hydraulic model-HEC-RAS.
I normally start with survey data or some digital spatial data in GIS and use it – by means of the GIS-based application (C3D) – to delineate watersheds and develop watershed parameters for hydrologic modeling – in this case HEC-HMS. After adding precipitation data, I run the hydrologic model and determine the flow values corresponding to different amounts of rain fallen in a given area. These flow values can be then entered into the hydraulic model – in this case HEC-RAS – to generate water elevation values. In order to input the river and surrounding geometric data into the hydraulic model, the geometric information is extracted from a very detailed digital representation of the terrain in GIS. The application used to link GIS and HEC-RAS is called Steltmen. Steltmen extracts the information contained in the TIN, exports it into HEC-RAS, reads the results of the hydraulic model and represent the flooded areas. Computer models are definitely cutting the time and easing the process.
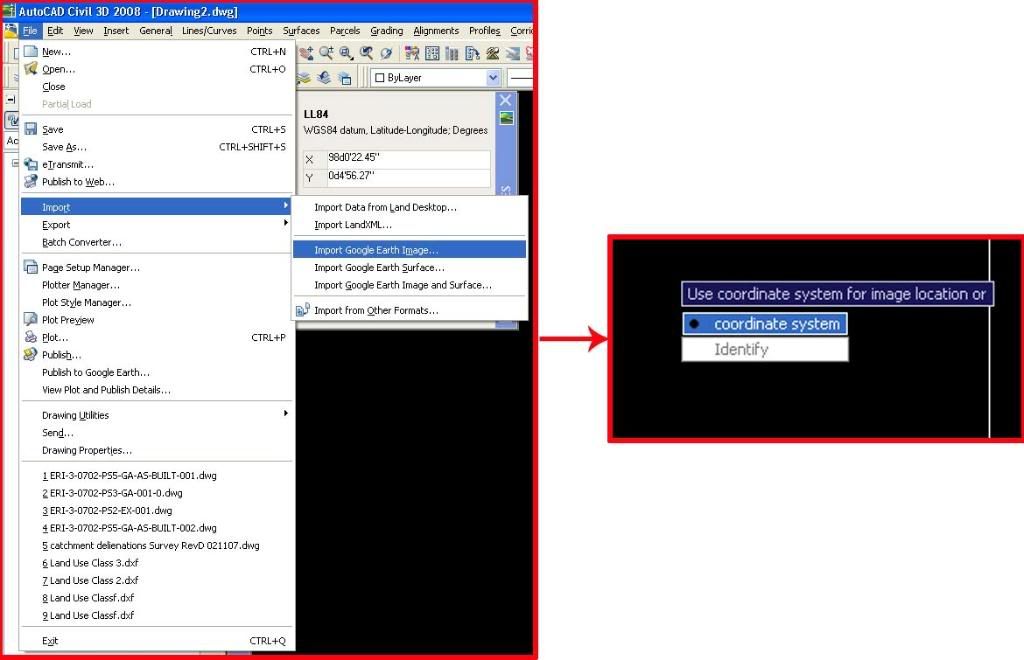
IN this post, I’d like to share a trick I used to import google image into C3D. We all know that C3D 2008 allows us to import google image into C3D provided that you have defined the coordinate system. This is definitely a great tool which I deployed extensively in the course of my work. However, the image imported is in grayscale which isn’t so neat. I figured a way to import the image in color. First, you need to have both your AutoCAD C3D and google earth launched…the following images are self-explanatory…
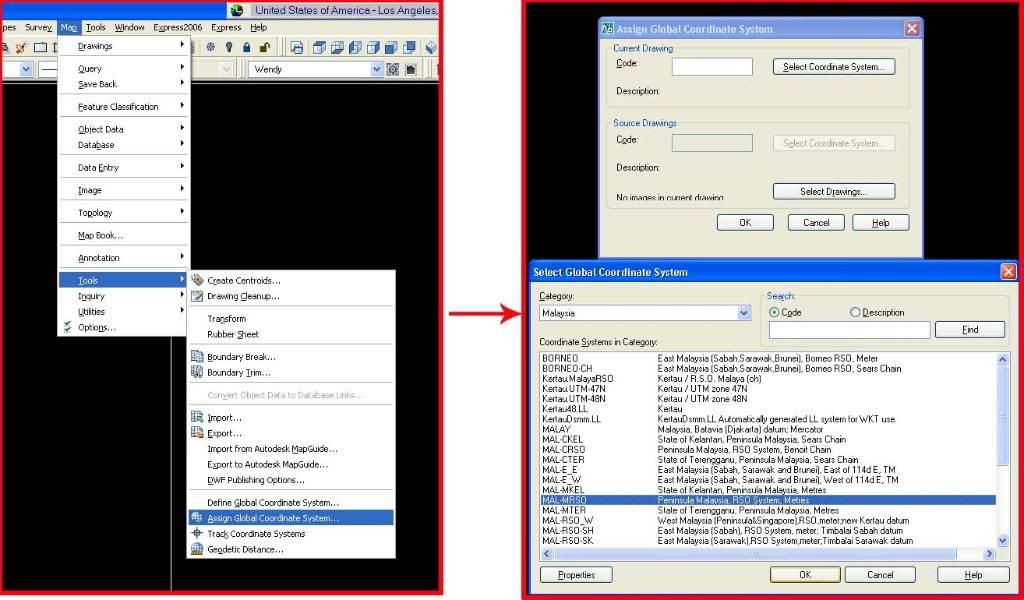 '>
'>
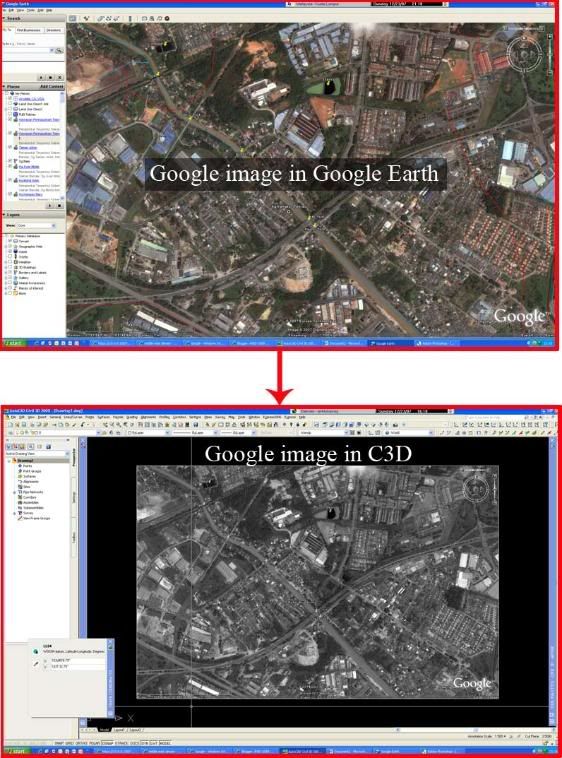
Then, save the image as JPEG in Google earth at the exact position.
 '>
'> 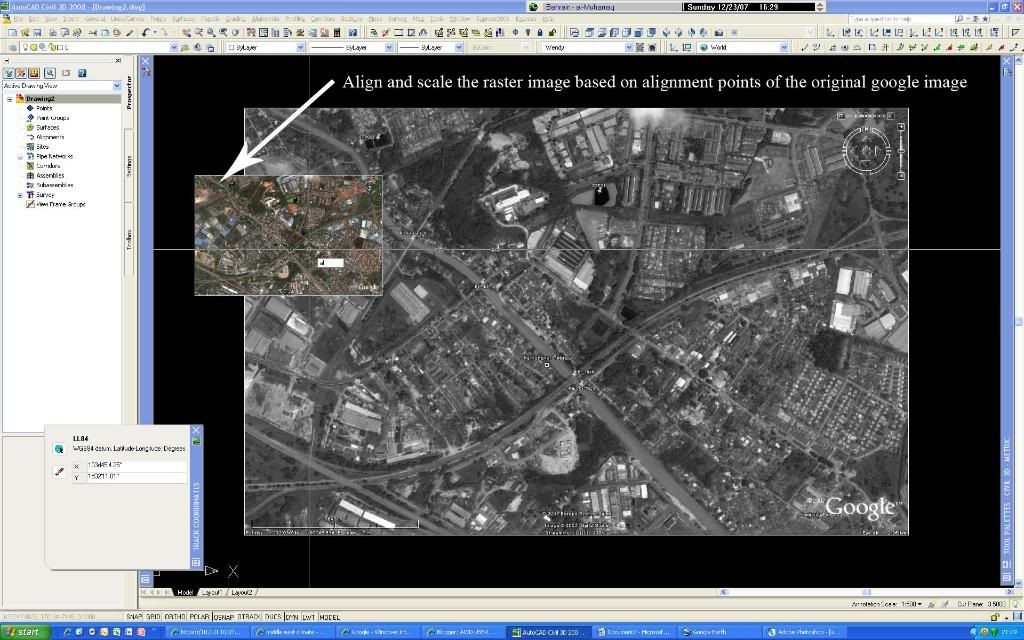 '>
'> 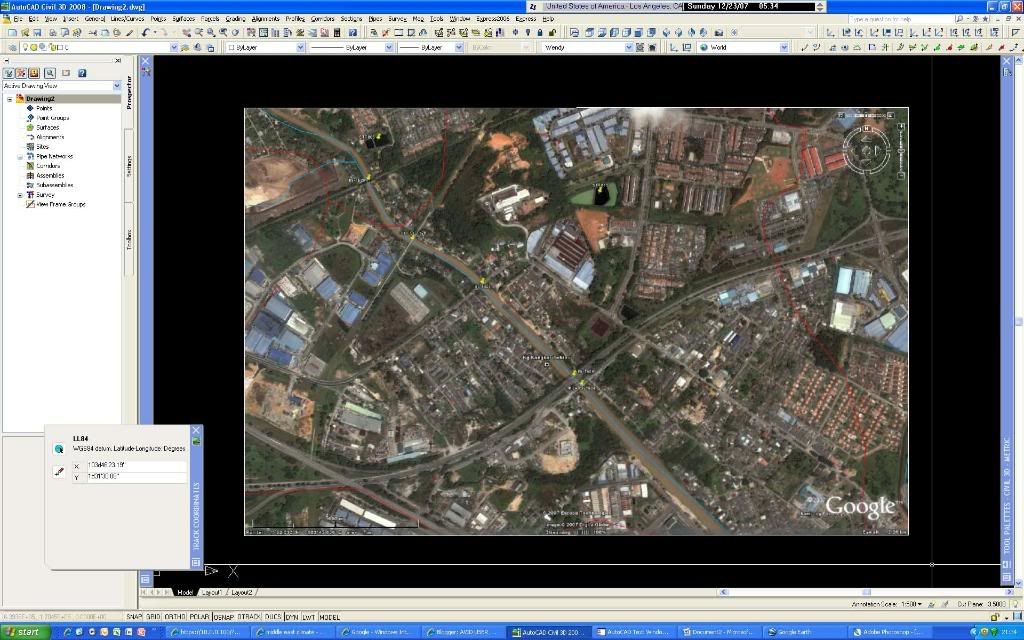
This is really easy and if you need a higher resolution, you can zoom in to the location of interest and repeat the steps above. How cool is that!



1 comment:
Nice tip but you should also see the Plex.Earth plugin for AutoCAD.
Post a Comment