
- There are three methods to create an editable mesh from Civil 3D. Generally, the points that generate the surface need to be displayed in Grid so that the surface can easily be edited using polygonal mesh in max. Expert in Max has told me that this surface display is easiest to edit in Max.
- This can be done either by one of the following methods:
- Method 1- Using EDITS surface
i. In prospector, right click on Edits and select Smooth Surface... The Smooth Surface dialog appears.
ii. Under Point Interpolation/Extrapolation Output, select the surface as the output region.
iii. Change the Grid X - spacing to 1 and similarly for Grid Y spacing. This spacing is dependent on the density of the mesh you want to see in MAX. The smaller the number (1 being the smallest), the denser the surface will become and this will impact the size of the file which obviously will be large as well.
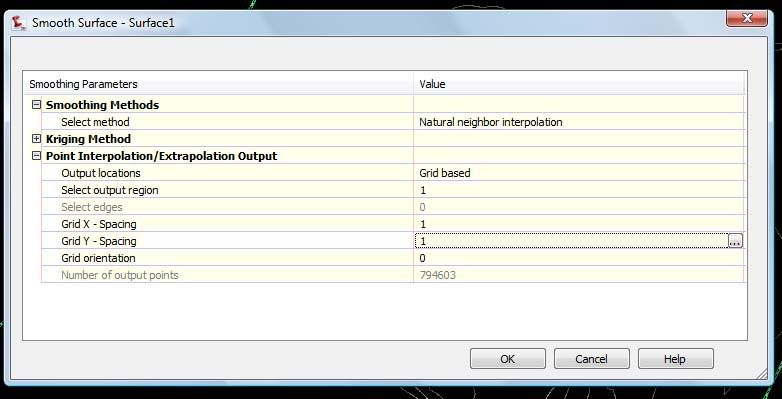
Figure 1.0
iv. When completed, your surface would have displayed the 1 m Grid spacing as shown in Figure 2.0
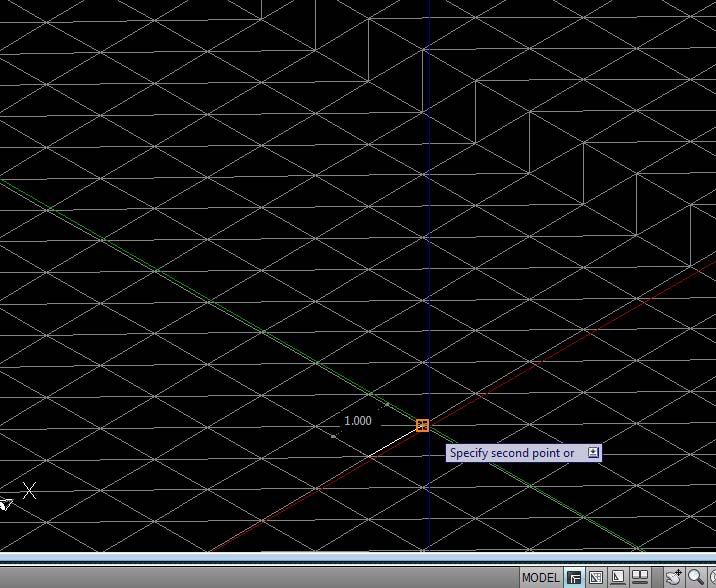
Figure 2.0
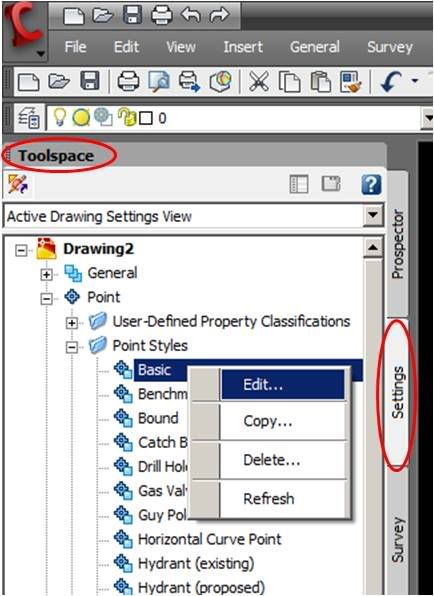
v. Change the display of the surface to show just points in the isometric view. Create a new Surface style under Surface properties.
vi. Name it Points. Navigate to Points Tab and change both the +Data Point Symbol and Derived Point Symbol to ![]()
vii. Then, click on the Display tab and change the View Direction to Model. Make sure the only component that is visible is Points.
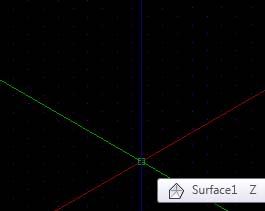
Figure 3.0
viii. Export the surface to AutoCAD from the main menu, File>Export>Export to AutoCAD>2007 Format as shown in Figure 4.0
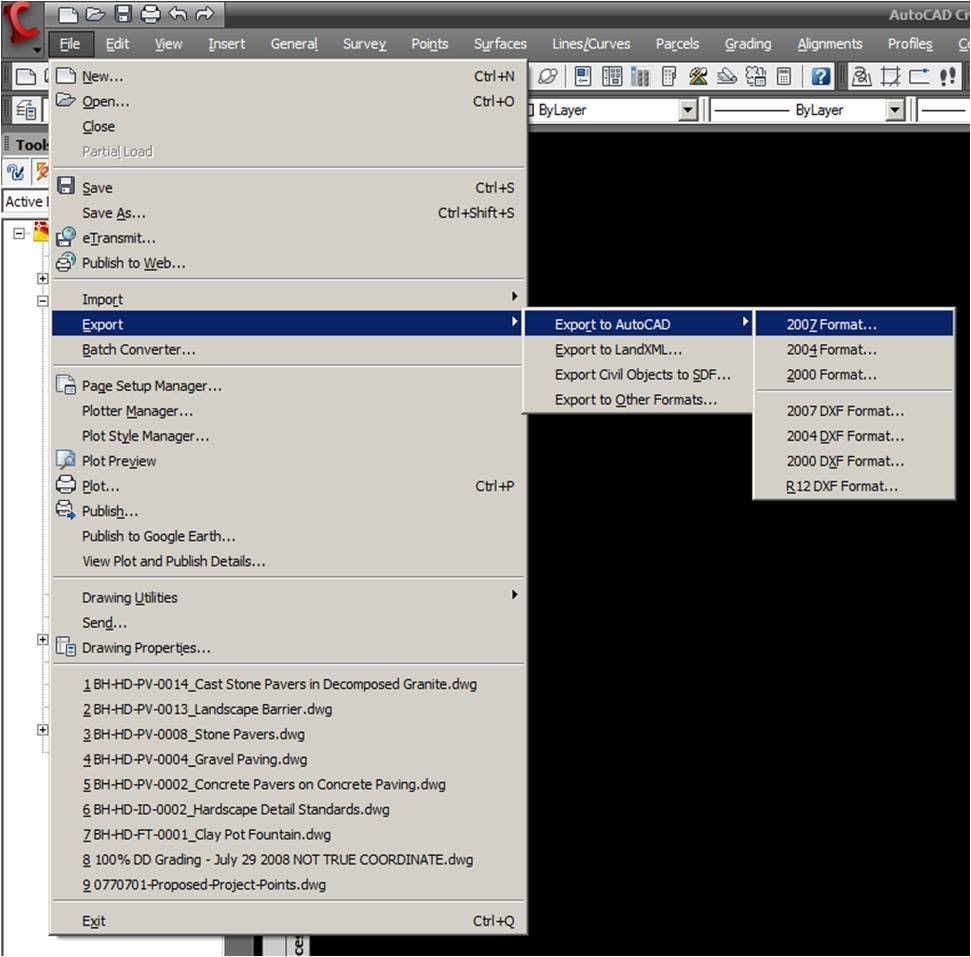
Figure 4.0
ix. Import the Exported AutoCAD surface to 3D studio max.
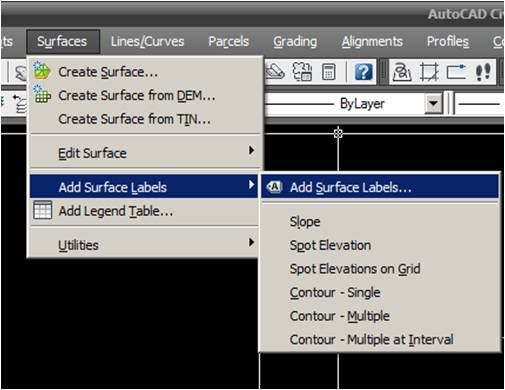
- Method 2- Using Civil 3D points or COGO points
x. In prospector, right click on Points and select Create... The Create Points dialog appears.
xi. Expand the Create Points dialog. Under Points Creation, change Prompt For Elevations to Automatic, Prompt For Point Names to None and Prompt For Descriptions to None as displayed in Figure 5.0
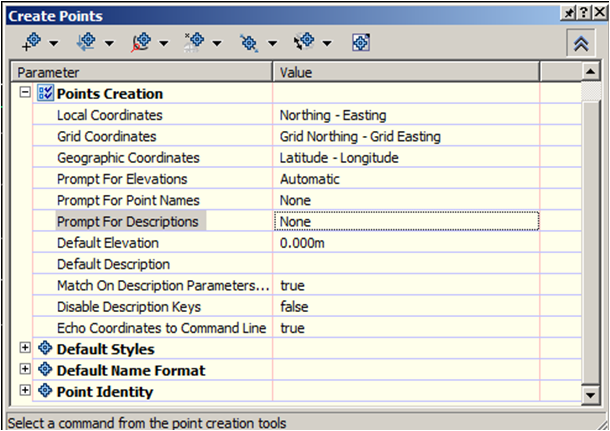 |
Figure 5.0
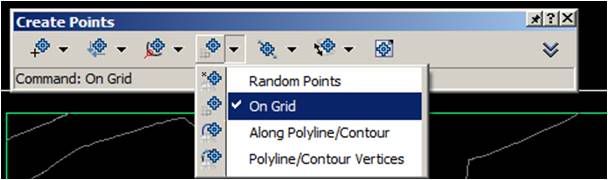 |
Figure 6.0
xiii. Select the surface when prompted. At the command-line prompt, pick the lower-left corner of the surface. Press enter or space when prompted to select Grid rotation. Enter the desired spacing when prompted Grid X spacing and Grid Y spacing. Pick the upper-right corner when prompted to Specify the upper right location for the grid:
xiv. When completed, your surface would display the points and elevations as displayed in Figure 7.0

Figure 7.0
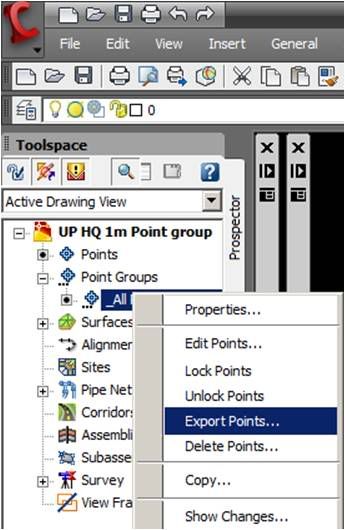 |
Figure 8.0
xvi. The Export Points dialog appears. Set the format field to ENZ (Comma Delimited).
xvii. Click the file folder button and navigate out to save the output file.
xviii. Leave all other boxes unchecked.
xix. Click OK.
xx. The above steps (i - x) are to export points in a grid format and to obtain the points in a desired ACSII format. The ASCII format can be in txt, prn, auf,csv, xyz...etc
xxi. Cr eate a new drawing using the _AutoCAD Civil 3D (Metric) NCS Extended Template.
xxii. From the main menu, choose Surfaces >Create Surface. The Create Surface dialog appears.
xxiii. Change the Name value to Grid points, and click OK to close the dialog.
xxiv. In Prospector, expand the Surfaces > Grid Points> _ Definition branches.
xxv. Right-click on Point Files and select the Add option. The Add Point File dialog appears.
xxvi. Set the Format field to ENZ (Comma Delimited).
xxvii. Click the Browse button shown in Figure 9.0. The Select Source File dialog opens.
xxviii. Navigate to the Data folder, and select the txt file saved in step vii.
xxix. Click OK.
xxx. Click OK to exit the Add Point File dialog and build the surface.
xxxi. Right-click on Grid Points in Prospector and select the Zoom To option to view the new surface created.
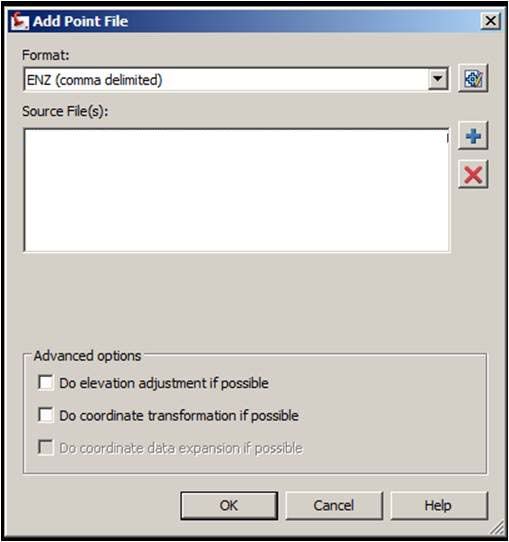
Figure 9.0
xxxii. Export the surface to AutoCAD from the main menu, File>Export>Export to AutoCAD>2007 Format as shown in Figure 4.0
- Method 3- Using AutoCAD points
 |
 |
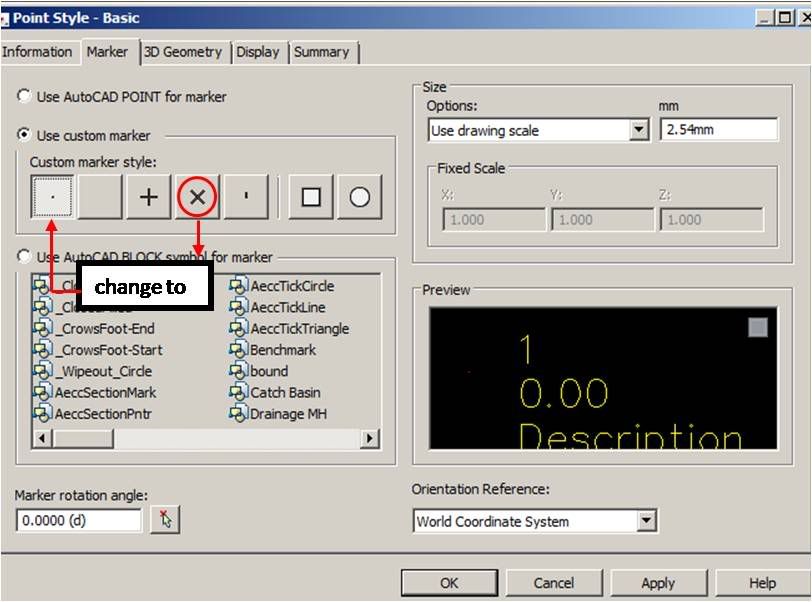 |
Figure 13.0
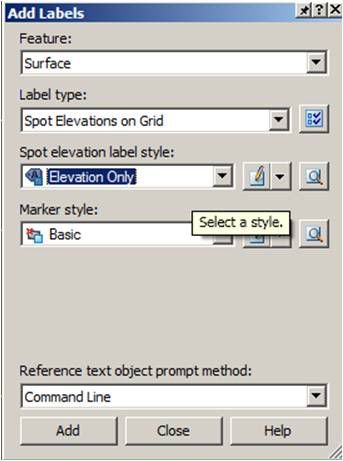
iv. Click Add (Figure 11.0). At the command-line prompt, pick the lower-left corner of the surface. Press enter or space when prompted to select Grid rotation. Enter the desired spacing when prompted Grid X spacing and Grid Y spacing. Pick the upper-right corner when prompted to Specify the upper right location for the grid:

Figure 14.0
xxxiv. Export the surface to AutoCAD from the main menu, File>Export>Export to AutoCAD>2007 Format as shown in Figure 4.0


7 comments:
is there a reason you export to cad insted of importing the civil 3d file directly into max, with the file link manager? That way if a edit is made to the surface it is reflected in the max file.
Your blog keeps getting better and better! Your older articles are not as good as newer ones you have a lot more creativity and originality now keep it up!
I want not approve on it. I over precise post. Particularly the title attracted me to read the whole story.
Amiable brief and this fill someone in on helped me alot in my college assignement. Say thank you you seeking your information.
Post a Comment